Milk caps, as the name describes, are mushrooms with milk in their caps. Easy name, easy to identify! These are one of the safest mushrooms to begin with, as the milk-like fluid (‘maitiaisneste’) makes them easy to differentiate from other mushrooms. Finland offers plenty of different milk caps, learn a few and you’ll get your basket full in no time. Some of the best milk caps are Lactarius trivialis (‘haaparousku’), Lactarius torminosus (‘karvarousku’) and Lactarius rufus (‘kangasrousku’).

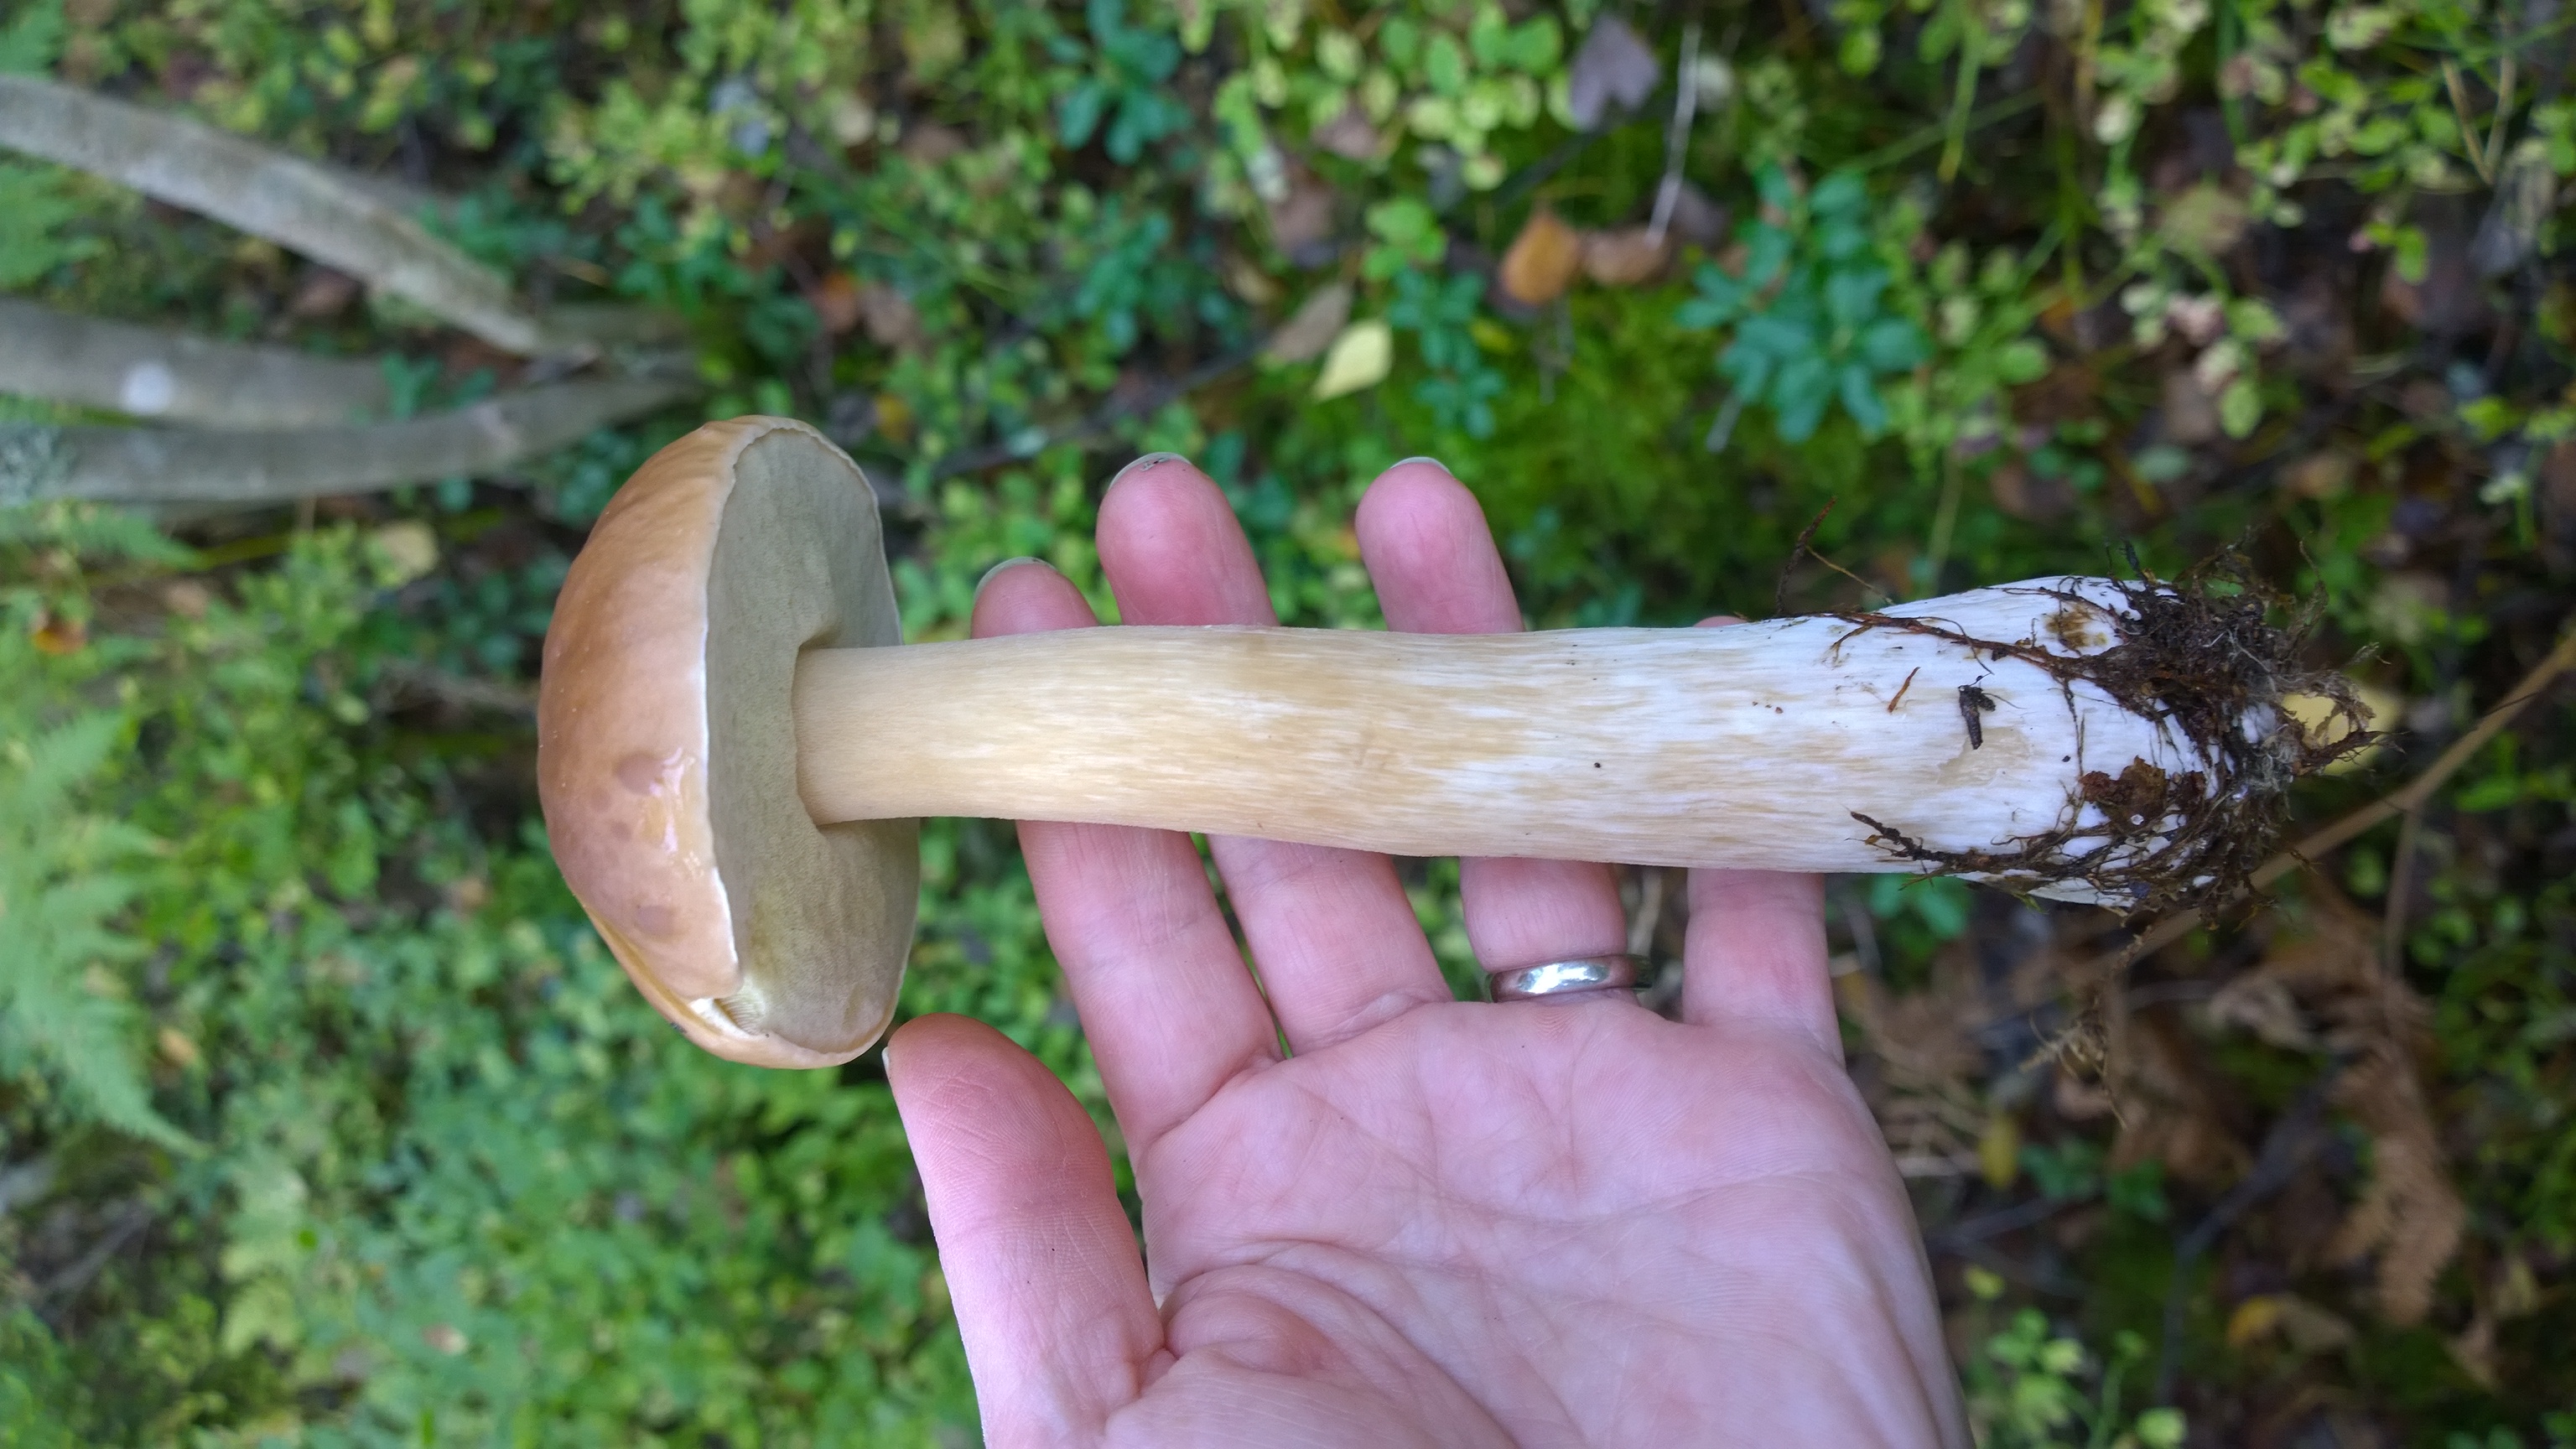
Lactarius trivialis has beautiful round cap, and its gray color shifts to purple or lilac. Its stem is always hollow, like a telescope. It also has very peculiar scent, it’s a mushroom that smells like..well, mushroom! Find it in the forest and smell, and you’ll know what I mean by that. It has very earthly and fresh scent. I’ts one of the most popular commercially sold mushroom in Finland.

Lactarius utilis is a relative to Lactarius trivialis, but it’s color is more pale and it’s often more slimy, making it less attractive to pick as the needles and leaves stick to the cap as if they were glued to it. If you don’t mind a bit of extra work, this is still a good mushroom to pick as well.
There are plenty of different gray color milk caps, but they all have their own unique identifiers, such as color to which the milk slowly turns when mushroom is cut (green, gray, lilac) or the scent the mushroom has (fresh, coconat, chicory) and of couse the size and the shape of the cap. It can take you some time to learn them, but Lactarius trivialis is easy mushroom to start with as the hollow stem is easy identifier that most of the gray colored milk caps don’t have. Lactarius trivialis milk turns slowly towards grayish green. Especially when you boil the mushroom, you will see the green color appear. If the color turns to lilac, you have picked Lactarius uvidus (‘korpirousku’) instead, probably you have forgotten to check that the stem is hollow when you picked the mushroom. No harm done as that one is also edible, just different tasting milk cap. Just make sure that you always check that the mushroom you pick as a milk cap really does contains the white milk-like fluid. Lactarius helvus (‘lakritsirousku’) is the only poisonous look-a-like for the edible milk caps. Including this into the milk cap ‘lactarius’ family is a bit misleading, as this one doesn’t lactate at all. Instead the fluid is clear like water and the scent recembels liquorice (what’s what the Finnish name lakritsi actually means).
 Lactarius torminosus (‘karvarousku’) is a pretty pink and hairy milk-cap. Especially the young mushrooms are very cute. It’s also called woolly milk-cap or bearded milk-cap. The Finnish name ‘karva’ actually literally means ‘hair’. Don’t bother to peel of the woolly cover from the cap, it’s exactly the same edible substance as the rest of the mushroom. These mushrooms you’ll find nearby birch trees, as they live in symbiosis with birch. This is one of the early milk-caps to appear, season starts from July and continues to late September-October. I think it’s one of the prettiest mushrooms we have in Finland! And it certainly wants to be found, as the pink color is not exactly a great disguise in Finnish nature…


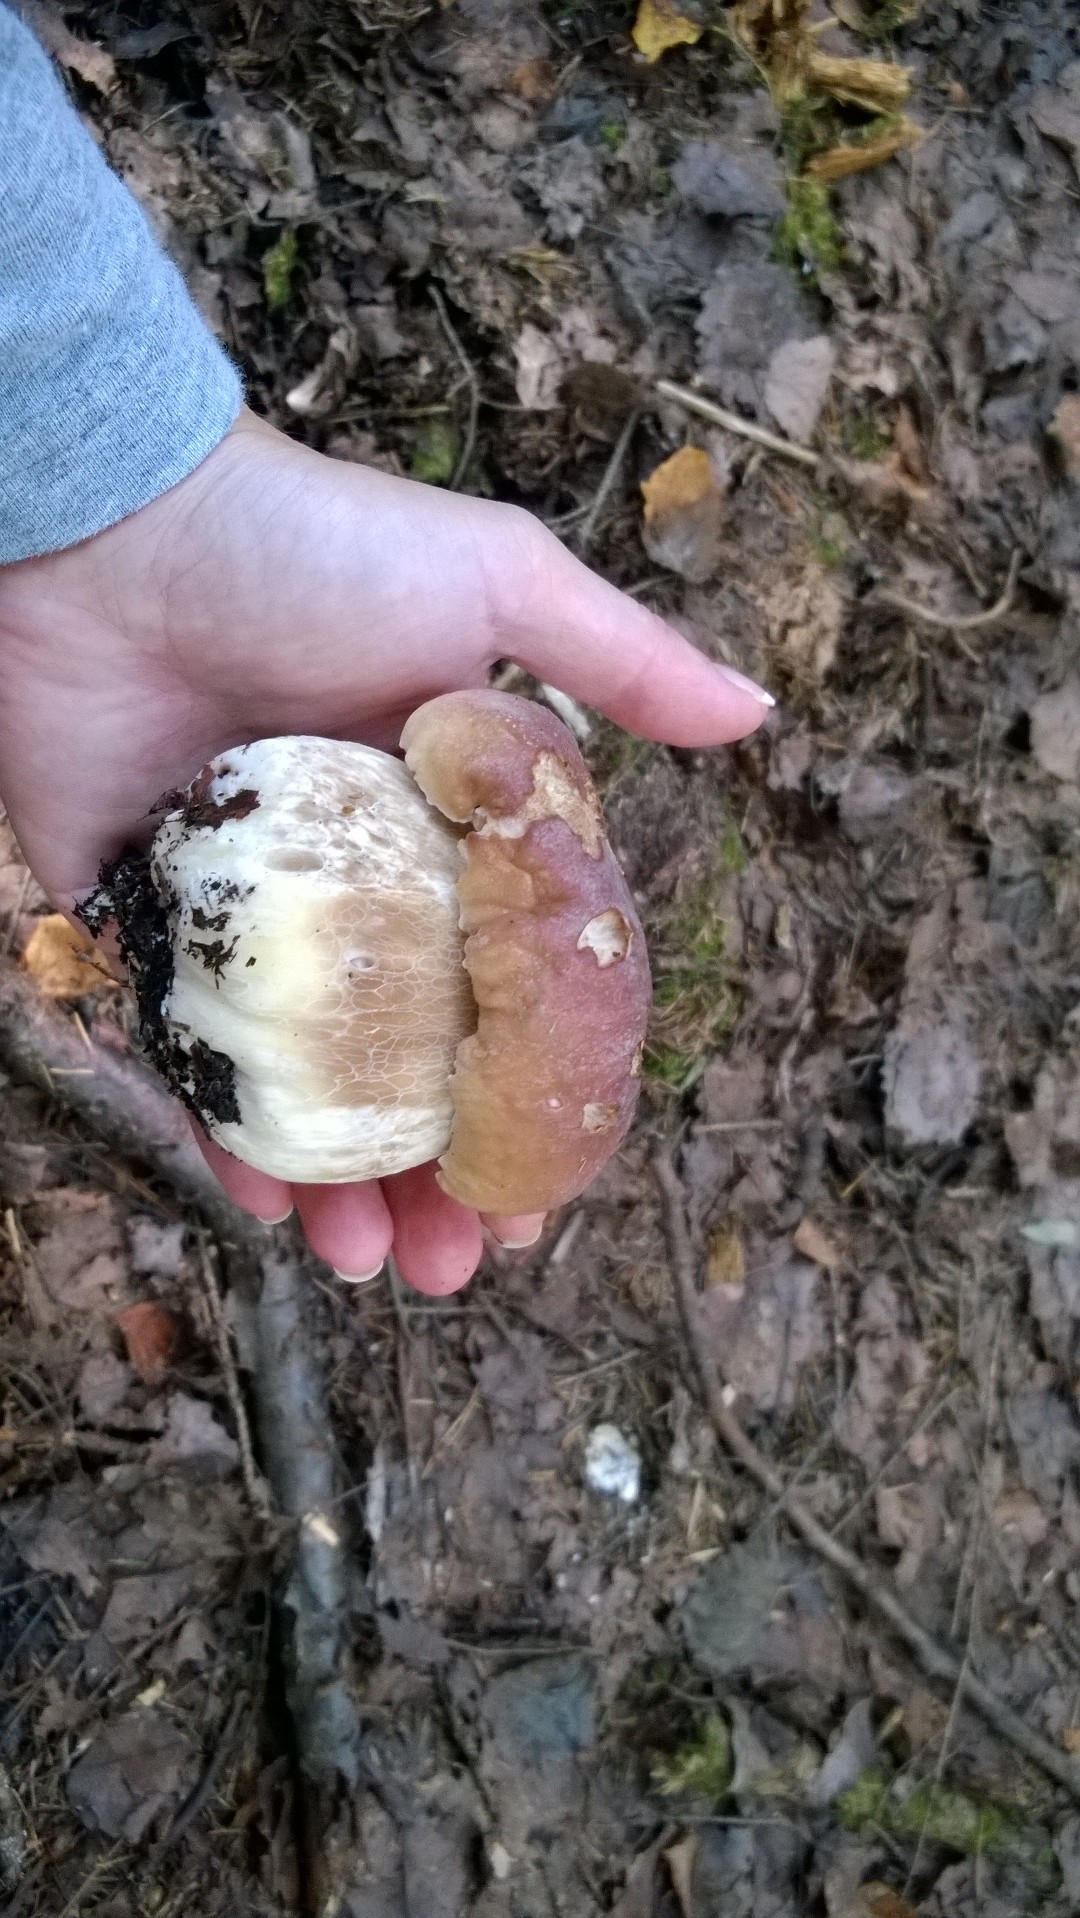
Lactarius rufus (‘kangasrousku’) has a stronger, more bitter taste than the above two. You can recognize it from the pointy tip in the middle of the cap, and the gingerbread color. It’s quite modest when it comes to living habitat, so it’s easier to find even in dry places. The cap turns beautifully dark brown when boiled, so it’s also visually pleasant mushroom to use in cooking.
 All of these milk-caps need to be boiled in plenty of water for 5 -10 minutes to remove the bitterness (for best result boil for 5 min and then change the water and boil for another 5 min). In Finnish this type of boiling is called ‘ryöppäys’. Boiling is not only for the taste, but to remove the ingredients that may cause stomach ache or nausea. After boiling these are excellent mushrooms to use. Lift the mushrooms out of the water with a spoon (‘reikäkauha‘) into a collander (‘siivilä‘). This way the dirt and needles that may have been hiding in the gills will stay on the bottom of the kettle and you get clean mushrooms for cooking. Rinse the mushrooms with cold water until they are cool and the squize the water off with your hands. You can use the water from the kettle as organic fertilizer in your garden.
My favorite way to conserve milk-caps is to use the traditional Finnish way of salting the mushrooms. Some prefer to ferment (‘hapattaa’) them to preserve more of the taste and the nutrients. Another popular traditional way is to conserve them in vinegar. Mushroom salad made out of milk caps is something we always had at the Christmas dinner in my childhood. The salad is made out of the salted milk caps.
Try out this easy mushroom salad recipe:
2 dl of milk caps chopped into small pieces (boiled, rinced and squized as described above – if you are using salt conserved milk caps remember to soak them in plenty of water to get the salt to tolerable level)
1 onion or leek chopped into small pieces
(1 green apple chopped into small pieces)
2dl of sour cream (‘kermaviili’) or 2dl of cream whipped into thick foam
1 tea spoon of vinegar (try apple vinegar or white wine vinegar)
0,5 tea spoon of salt
white pepper or black pepper
Mix the ingredients together and season with salt and pepper. Serve cold. The taste of the salad gets only better if you let it rest over night in the fridge. The salad goes great with the Christmas ham or turkey and on top of a slice of rye bread.